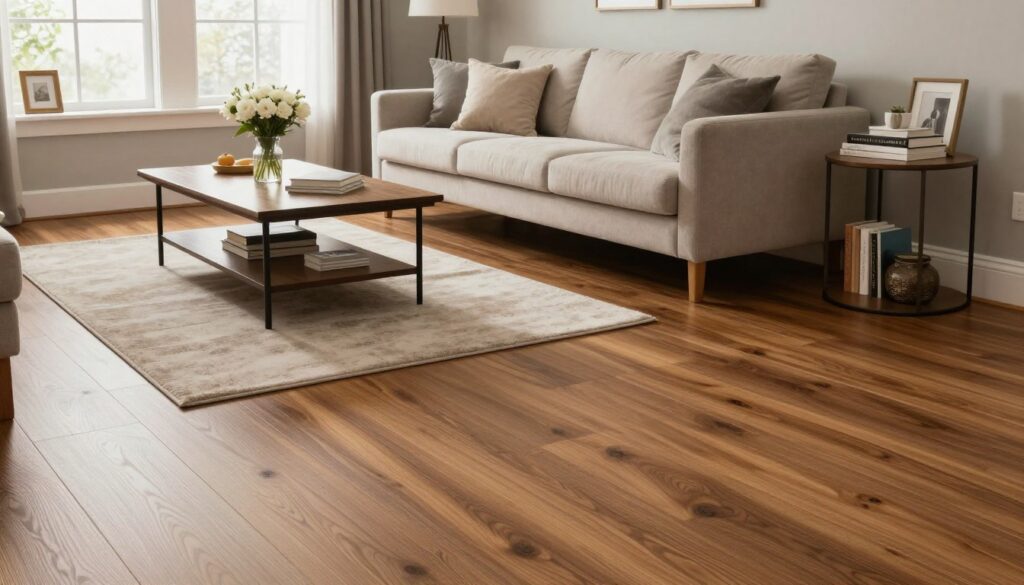
Why Vinyl Flooring with Underlayment Creates the Perfect Foundation
Vinyl flooring with underlayment combines the waterproof durability of modern vinyl with improved comfort, sound reduction, and thermal insulation. Here’s what you need to know:
Key Benefits:
- Sound Reduction: Up to 20 decibels less impact noise
- Thermal Comfort: Floors stay up to 5°F warmer
- Moisture Protection: Vapor barrier prevents subfloor damage
- Improved Comfort: Cushioned feel underfoot
- Subfloor Protection: Smooths minor imperfections
When You Need Underlayment:
- Installing over concrete subfloors (always requires vapor barrier)
- Vinyl planks without attached pad backing
- Areas requiring extra sound insulation
- Rooms with radiant heating systems
When to Skip Underlayment:
- Luxury vinyl with pre-attached cushioning (can void warranty)
- Manufacturer specifically prohibits additional layers
- Perfect wood subfloors in quiet environments
The decision comes down to your specific vinyl product and installation conditions. Over 90% of luxury vinyl plank products now include attached underlayment, but separate underlayment still plays a crucial role in many installations – especially over concrete or when maximum comfort is desired.
Modern vinyl flooring technology has revolutionized home flooring, but the underlayment choice can make or break your installation’s long-term performance and comfort.

Vinyl flooring with underlayment vocab to learn:
Vinyl Flooring with Underlayment: Planning & Prep
Getting your vinyl flooring with underlayment project right starts long before you roll out that first piece. After installing countless floors across South Florida, we’ve learned that a little planning upfront saves you from headaches (and heartaches) later.
Subfloor Assessment: The Foundation of Success
Think of your subfloor as the foundation of a house – if it’s not right, everything else suffers. We always tell our clients that spending time here pays dividends down the road.
When you’re dealing with concrete subfloors, moisture is your biggest enemy. Florida’s humidity doesn’t mess around, so you’ll always need a vapor barrier – at least 6 mil polyethylene. We use moisture meters to test every concrete slab because what looks dry might be harboring moisture that’ll cause problems months later.
Concrete also loves to be uneven. Check for level variations exceeding 3/16″ over 10 feet using a long straight edge. Those little bumps and dips that seem harmless now will telegraph right through your beautiful new floor.
Plywood and OSB subfloors are generally more forgiving, but they have their own personality quirks. Walk around and listen for squeaks – they’re telling you something’s loose. Check for protruding nails that could puncture your vinyl, and make sure everything’s clean and dry.
Here’s the good news: most plywood subfloors don’t need a vapor barrier unless your manufacturer specifically asks for one.
Understanding Pad-Attached vs. No-Pad Vinyl
This is where many DIYers get tripped up, and honestly, it’s not their fault – the industry could explain this better.
Most vinyl planks today come with pad already attached – we’re talking about 90% of what’s on the market. These products have integrated cushioning that’s perfectly matched to the plank. Adding extra underlayment is like wearing two pairs of socks in tight shoes – it creates problems.
The attached pad can actually stress the locking systems when you add more layers underneath. We’ve seen beautiful floors fail because someone thought “more cushioning must be better.”
No-pad vinyl gives you more control but requires more decisions. You get to choose exactly how much cushioning and sound reduction you want. It’s more work, but sometimes it’s worth it for specific situations.

Cost Analysis: Investment vs. Value
Let’s talk numbers because we know that matters to real families making real decisions.
Underlayment materials range from basic foam at $0.25-$0.50 per square foot up to premium rubber at $0.75-$1.50. Felt sits in the middle at $0.35-$0.65, while cork runs $0.50-$1.25. The price usually reflects performance – you get what you pay for.
Professional installation adds $1.50-$3.00 per square foot, but here’s what we tell our South Florida clients: the labor cost often pays for itself in time saved and mistakes avoided. We’ve fixed plenty of DIY projects that would’ve been cheaper to do right the first time.
The long-term value is where underlayment really shines. Sound reduction makes your home more pleasant to live in and more valuable to sell. Thermal comfort means your feet aren’t shocked by cold concrete on those rare chilly Florida mornings. Most importantly, moisture protection prevents the kind of subfloor damage that requires tearing everything up and starting over.
| Underlayment Type | Cost per sq ft | Best For | Key Benefits |
|---|---|---|---|
| Foam | $0.25-$0.50 | Basic cushioning | Affordable, easy install |
| Felt | $0.35-$0.65 | General purpose | Good sound/thermal balance |
| Cork | $0.50-$1.25 | Eco-conscious | Natural, antimicrobial |
| Rubber | $0.75-$1.50 | Maximum performance | Superior sound reduction |
Benefits of Vinyl Flooring with Underlayment
The science backs up what we see in our installations every day. Vinyl flooring with underlayment delivers measurable improvements that make a real difference in daily life.
Sound reduction is probably the most noticeable benefit. Quality underlayment can reduce impact sound by up to 20 decibels. In our multi-story homes in Coral Springs and Parkland, this means the difference between hearing every footstep from upstairs and enjoying peaceful quiet.
Thermal comfort might surprise you with how much it matters. Felt underlayment over concrete keeps floors up to 5°F warmer. In South Florida’s air-conditioned homes, that prevents the shock of stepping onto cold concrete first thing in the morning.
The cushioned feel reduces fatigue when you’re standing for long periods. We notice this especially in kitchens where families spend lots of time cooking and gathering. Your feet and back will thank you.
Subfloor protection works behind the scenes to smooth minor imperfections and prevent them from showing through your finished floor. It’s like wearing a good foundation – everything looks better on top.
For deeper insights into these benefits, check out Scientific research on insulation and our guide to Vinyl Flooring Advantages.
Does Your Vinyl Flooring Need Underlayment?
This is the question that keeps homeowners up at night, and for good reason – get it wrong and you could void your warranty or create installation problems.
You absolutely need underlayment when installing over concrete (that vapor barrier isn’t optional in Florida’s climate), when your vinyl planks don’t have attached padding, or when you need maximum sound reduction. Radiant heating systems also typically require specific underlayment types.
Never add extra underlayment when your manufacturer says not to – we’ve seen too many warranty claims denied because someone thought they knew better. Pad-attached vinyl with extra layers underneath can cause locking systems to fail spectacularly.
The gray area involves wood subfloors with pad-attached vinyl where comfort is the main concern. Sometimes the manufacturer allows it, sometimes they don’t. Always check those specifications first.
We’ve learned that warranty compliance isn’t just about covering your investment – it’s about ensuring your floor performs as designed. The manufacturers spend serious money testing these systems, and deviating from their specs usually creates problems.
Understanding how vinyl compares to other flooring types helps with this decision. Our Vinyl Plank vs Laminate comparison explains the key differences that affect underlayment choices.

Installation & Care Guide for Long-Lasting Results
Getting your vinyl flooring with underlayment installation right makes all the difference between a floor that looks great for years versus one that develops problems down the road. After countless installations across South Florida, we’ve learned what works – and what doesn’t.
The good news? With the right approach and tools, you can achieve professional results whether you’re tackling this as a DIY project or working with our team.
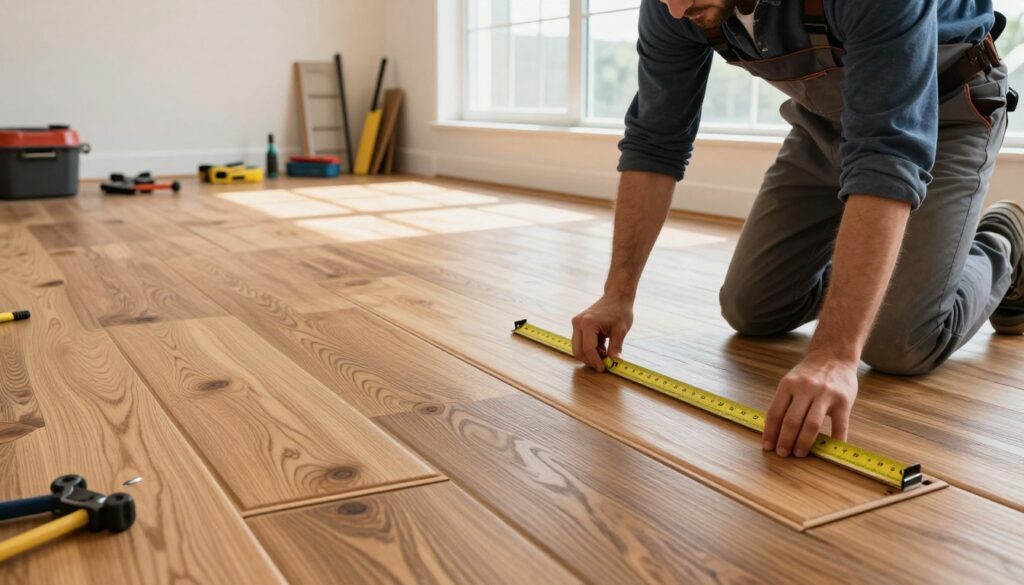
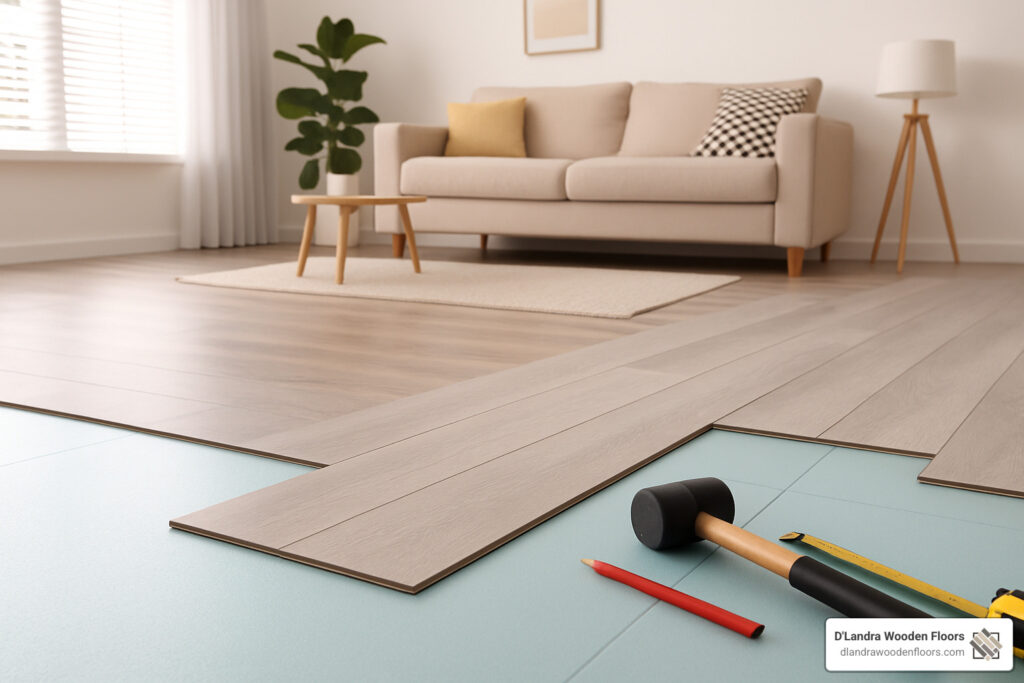
Proper Underlayment Installation Best Practices
Before we even think about laying the first plank, the underlayment needs to be perfect. We’ve seen too many beautiful floors ruined by rushed prep work, so here’s how we do it right every time.
Start with a spotless, bone-dry subfloor. We vacuum thoroughly and check every square inch for debris, protruding nails, or loose boards. Think of it like painting – you wouldn’t paint over dirt, and you shouldn’t install over an imperfect surface.
For concrete subfloors, the 6 mil polyethylene vapor barrier goes down first. Roll it out with the film side facing up and felt side down. Here’s the critical part: overlap edges by 6 inches and seal every seam with 2-inch clear packing tape. No gaps, no shortcuts. This creates your moisture fortress protecting everything above.
The underlayment itself requires surgical precision. Roll it out perpendicular to your planned vinyl plank direction, maintaining at least 4 inches separation between underlayment seams and finished floor seams. Why? Because aligned seams create weak spots that lead to squeaks and movement issues.
Seams should butt flush without overlapping – overlaps create bumps that telegraph through your beautiful new floor. We tape moisture barrier seams religiously, but avoid taping felt or foam underlayment seams unless the manufacturer specifically requires it.
Around the perimeter, flash that plastic sheeting up the walls behind where your baseboards will sit. Maintain proper expansion gaps and seal everything with 100% silicone caulk. This prevents moisture infiltration while allowing your floor to breathe and move naturally.

Here’s what we’ve learned from experience: work in manageable sections to avoid wrinkles, keep fresh blades in your utility knife for clean cuts, and never compress the underlayment during installation. Your future self will thank you for taking time with these details.
Essential tools for success: utility knife with fresh blades, straight edge, measuring tape, chalk line, rubber mallet, tapping block, pull bar, and don’t forget safety glasses and knee pads. Trust us on the knee pads – your knees will appreciate the cushioning after a few hours.
For professional installation that takes the guesswork out of the process, check out our Services: Vinyl Flooring Installation page.
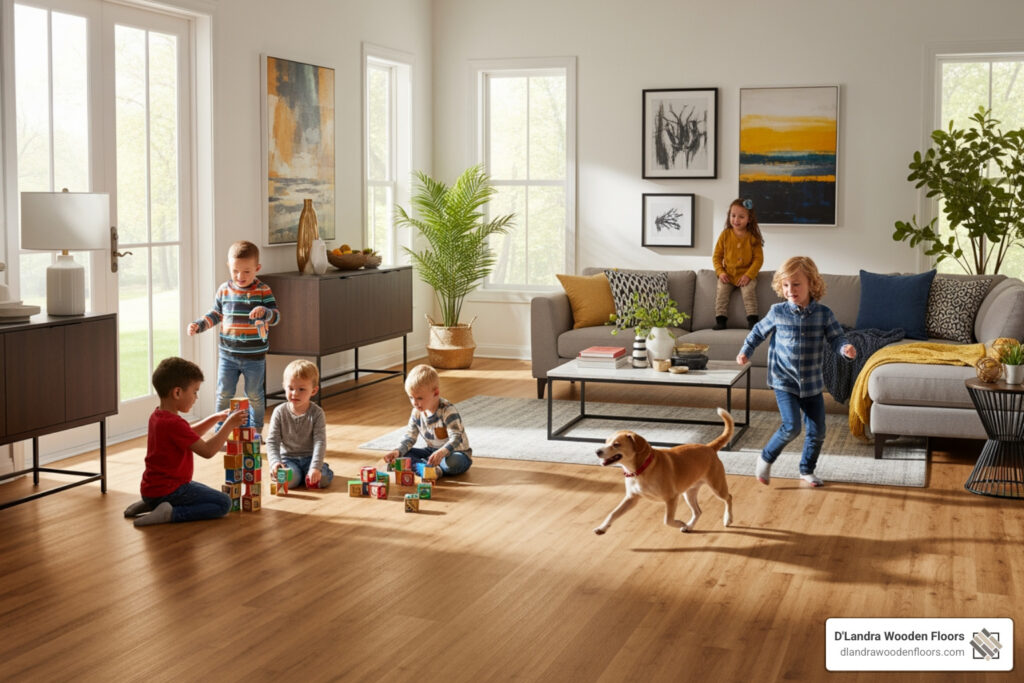
Caring for Vinyl Flooring with Underlayment
The beauty of vinyl flooring with underlayment is that it’s incredibly forgiving when it comes to maintenance. But a little care goes a long way toward keeping your floors looking showroom-fresh.
Daily habits make the biggest difference. Sweep or vacuum regularly to remove grit that can scratch the surface over time. Clean spills immediately with a damp cloth – even though vinyl is waterproof, standing liquids can find their way into seams. Use doormats at entrances to catch dirt before it gets tracked across your beautiful floors.
Weekly cleaning is simple and effective. Damp mop with pH-neutral cleaners only. Harsh chemicals, waxes, and polishes can damage the protective wear layer. Never use abrasive scrubbers or steel wool – they’ll scratch the surface and dull the finish.
Long-term maintenance keeps your investment protected. Trim pet nails regularly to prevent scratches, use furniture pads under heavy items, and avoid rubber-backed rugs that can cause permanent staining. Maintain consistent indoor humidity levels – especially important here in South Florida where we battle humidity year-round.
What to absolutely avoid: Steam mops can damage seams despite what some manufacturers claim. Ammonia-based cleaners are too harsh. Even though vinyl is waterproof, excessive water during cleaning can seep into seams and cause problems. Never drag heavy furniture without proper protection.
The underlayment actually makes maintenance easier by providing a stable, cushioned base that reduces wear patterns and extends your vinyl’s lifespan. It’s like having built-in protection for your investment.
We work with many pet owners throughout Weston and Parkland, and proper care keeps their floors looking pristine despite daily paw traffic. For specific pet-related maintenance tips, our Vinyl Flooring for Pets guide covers everything you need to know.
When problems arise, here’s what to look for: Squeaking or popping sounds usually indicate uneven subfloor or improper seam alignment, possibly moisture issues under concrete. Edge lifting often means expansion gaps weren’t maintained properly or moisture is infiltrating. Wear patterns are normal in high-traffic areas – rotate furniture periodically and use area rugs in heavy-use zones.
Ready to Upgrade Your Floors in South Florida?
After installing thousands of square feet of vinyl flooring with underlayment throughout South Florida, we’ve learned that success comes from proper planning, quality materials, and knowing when to call in the professionals.
At D’Landra Wooden Floors, we take the guesswork out of vinyl flooring installation. Our fully insured team brings years of local experience to every project, whether you’re updating a single room or renovating your entire home.
Professional installation protects your investment through warranty compliance, access to professional-grade materials, expert subfloor assessment, and time savings that let you focus on enjoying your new floors instead of stressing over installation details.
We proudly serve homeowners throughout Coral Springs, Parkland, Weston, and all of South Florida with flooring solutions designed for our unique climate and lifestyle. Our free in-home estimates include detailed space assessments, subfloor condition evaluations, and underlayment recommendations with transparent pricing and no hidden fees.
Ready to see what precision installation can do for your home? Visit our Vinyl Plank Flooring South Florida page to explore our complete services and see examples of recent installations.
Your floors are an investment in comfort, value, and beauty. Make sure they’re installed right the first time with D’Landra Wooden Floors – where every installation is built to last.